Trying something new part 1 – ETTR: exposing to the right
Welcome to what I call my third personal photo marathon. In actual fact this is the Steelhouse Festival 2014 where, over 2 days, I get to shoot 16 rock bands. After so many years this should be a doddle shouldn’t it? Like knowing something like the back of your hand or doing something blindfolded?
Well it’s not quite like that as even on familiar ground things have a way of changing. This year the photo pit seemed a little narrower and there was also a runway at the front of the stage for the performers to interact a little more with the crowd. This effectively chopped the stage in half as far as the photographers were concerned so there was less freedom of movement and more awareness was needed in the narrow pit of where the other photographers were in order to let one another pass. Whilst this had negative connotations I actually think that the divided stage was an advantage – acting as a kind of ‘traffic calming’ for photographers.
Also we in the pit got our first taste of being denied the full three song limit when one artist, perhaps taking umbrage at something, had us all escorted out before even the first song had ended. We all looked at each other non-plussed most of us wishing that we’d shot more – if only we’d known.
If that wasn’t enough add into the equation that I also chose to change a few things up this time around. I’d noticed from my own way of shooting that my exposure could be a little higher. Now this may seem counter-intuitive – either an exposure is right or wrong. That’s true but there are people out there who are exposing to the right (ETTR). This takes advantage of the DSLR’s sensor in it having more sensitivity in the highlights – the right side of the histogram. It has more dynamic range there than in the dark areas.
This method requires a bit of leap of faith if you don’t like seeing highlight warning blinkies on your LCD screen. Of course your whole screen shouldn’t be blinking but if you see a strip on the bridge of a nose or on someone’s forehead there’s no need to freak out. It is essential, of course, to be working in RAW for this to be effective.
I took that leap of faith and I got away with it - just about – and I tried something new in the process.
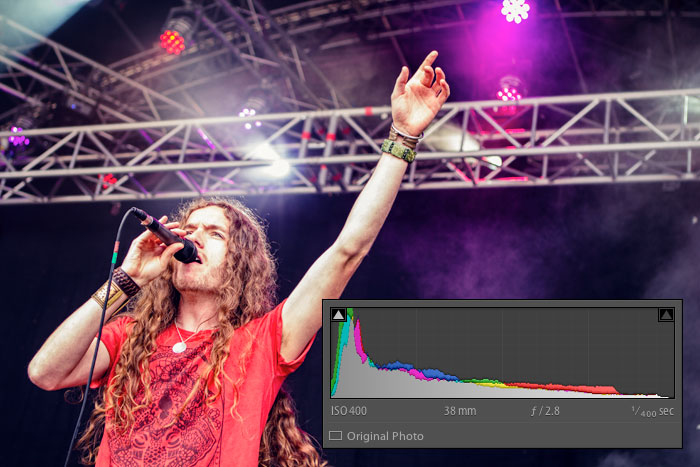
The photo below shows an exposure straight from camera. The red areas show the highlight warning and you can see that the histogram is biased towards the right. In actual fact I think that this one is a little overcooked. It’s way to close for comfort in this particular scenario. This amount of over-exposure might be more suitable for a fashion portrait where you want really light skin.

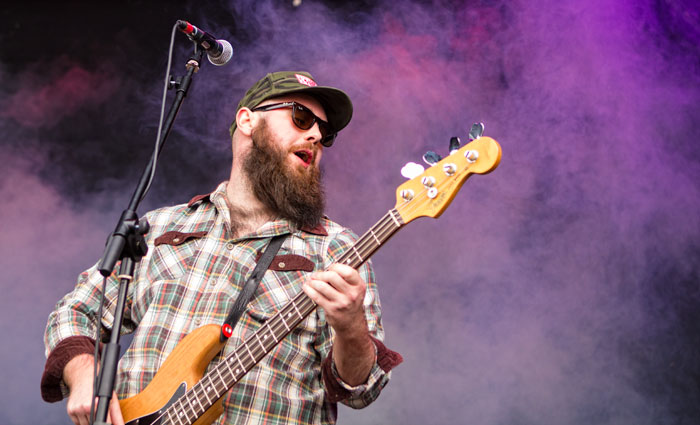
This next image shows the photograph after post-processing. See how the histogram moves back towards the left.
Subscribe to receive updates